.

Search This Blog

How to Draw Your Own Vector Wings


So I placed it into a new Illustrator file (by going to File > Place). Once in there, like a lot of the other tutorials on here that require tracing from a photo reference – I’ll be turning down the opacity of the image and locking it’s sub-layer.

So we’re gonna start tracing the feather out. We don’t need the plume on it, just the feathery part. I put enough crazy ridges and stray strands to keep it as a good base. I didn’t go too hyper on the first one because we’ll be duplicating the base shape and adding further detail to prevent the feathers from being so repetitive. We can’t have a boring wing, you know?

So I duplicated the feather base once and dragged it off to the side. I made a couple of my own tapered brushes for the detail. If you’re unfamiliar with making tapered brushes, we have more than a couple tutorials that touch on how to achieve this effect. It’s a whole tutorial in itself, so like last time, I’m omitting it from this one too. I added a ton of detailed strands all around both base shapes. I expanded the appearance on the brush strokes, deleted the invisible stroke marks (by making a transparent box, using the magic wand to select all the invisible lines, and hit the delete key) then added the shape of the details and the corresponding base feather together with the pathfinder. And we’ve got two feathers.

Now I start building the wing. The curvature comes into play here, because it’s what is going to give our wing a legit look. I duplicated each feather, and switched off each style to keep it different, while decreasing the size little by little. I know I reached a good stopping point when the detail in the wing begins to get lossy with the naked eye.

premium content rss
Now we need to add the secondary part of the wing. I duplicated the wing we have so far and added it with the pathfinder. I turned down the opacity (locking it’s sub-layer is up to you, but not necessary) and got to work with the additional part. I added the detail strands much like I did in the feather. I also added some more smaller feathers to give it some more character and kill off a little of the negative space.

Now I repeated the expanding of the brush strokes, deleted stray transparent lines, and merged the wing all together with the pathfinder tool. We have a wing! Now let’s duplicate it and mirror it like it’s shown below.

So let’s align this bad boy properly, and group it together.

You’re now equipped with a pretty nice set of wings to put behind your logo or graphic. I used a skull here from the Arsenal, well, because I can… and there you have it.

Now I’m gonna go look up some Hot Wing recipes and throw down in the kitchen. Adios!
-Dave

read more

A Pseudo-Sugar Skull: From Start to Finish.

sugarskull_finalimage_web.jpg
Hey people! It’s Dave again giving you all yet another excuse to get your knowledge on. This isn’t as direct as my previous Gigposter Tutorial (by the way – thanks to everyone who found that helpful!) because I’m actually covering a piece of my own artwork, and as we all know, there are just some things that are hard to explain during the process. Hence why I’m condensing it down to the nitty gritty. Kinda like a walk through my process if you will.

Oh, I almost forgot! I STRONGLY suggest you guys read our previous tutorials that deal with “start to finish” subject matter, especially anything involving Illustrator. If I re-wrote how to do everything we’ve already covered in previous tutorials in this one, I’d be up way past my non-existent bedtime. Now let’s start!
First I drew a half of a skull. Why half do you ask? Because we’ll be inking the outlines in Illustrator. Why do more work for yourself when you can just flip half of what you’ve already traced, connect them, and then run with it? Then I scanned it in.
First Sketch
scanned
I opened Illustrator and placed the image in a new file (once the new file’s been created – go to file, then place and browse for your image). I enlarged it to my liking, turned the opacity down, and locked into place.
placed1.jpg
opacity1.jpg
locked1.jpg
Alright, now I began to trace out the half of the skull. I kept the skull outline and eyes in black and made the teeth and nose in separate colors. This way I can edit them in case they don’t merge properly (which happens alot when I do skulls). If you’re lost as to how inking is done in Illustrator – we have a tutorial all about it here. Once everything lined up good and looked nice, I added them together then unlocked and ditched the placed file/ I was left with a clean outline.
inkedhalf.jpg
inkedwhole.jpg
inkedclean.jpg
Now I wanted to add some decorations to the skull. I was feeling like adding some tattoo-esque flourishes around the contour of the skull. So I grabbed some I had made from the upcoming Set 10 VectorPack release and carefully placed them in neat spots all around our skull’s face until I was satisfied.
decalsplaced.jpg
So I go into Photoshop, and start a new file. The size I used was 4×6 @ 300 dpi. I made the background a muted pinkish/red so the coloring I’ll be doing won’t be obstructed by loud-ass background colors. I pasted the outline of the skull into the piece as a vector smart object (copy and paste from Illustrator) and used the magic wand tool to make the selections of the portions that I wanted to color. Mind you, I kept the coloring done on layers I made below the inked outline. You never know when you can fumble up, so always keep your layers separate. In this case, I used a layer for the color of the skull and it’s teeth. HINT: If you encounter weird lines bordering your inked layers and your colored layers – try expanding the selection you made with the magic wand about 2-3 pixels. This way the color will bleed beyond the lines and look alot cleaner when sitting below the inked layer.
placedandcolored.jpg
Now with these layers separated, I ctrl+clicked the thumbnail in the layers box to make the entire contents of the layer a selection (keeps myself from coloring outside the lines), grabbed my wacom tablet (a mouse will suffice, we’re only airbrushing minimally), selected the airbrush tool, used a blurred edged brush at anywhere from 70 pixels to 170 pixels and went to town! I added shadows and I added highlights. Getting these exact results is hard because everyone colors differently, BUT YOU MUST KEEP THE FLOW DOWN ON YOUR BRUSH OPTIONS AND MAKE SURE YOU’RE NOT GOING PAST 30-40% OPACITY. This is crucial because it lets you gradually see the darkness as you apply brush strokes and make it feel real.
placedandcolored.jpg
colored-complete.jpg
I wanted to add texture at this point, so I opened a concrete image that i liked from our Texture Packs and dragged it over to the piece we’re working on (keep it below the inked layer so you can see what you’re doing. I moved it and sized it to where there wouldn’t be too many blemishes in the skull’s face from the concrete. I used the magic wand to select everything outside of the skull on the inked smart object’s layer, expanded the selection about 3 pixels, and deleted the excess off of the concrete photo’s layer.
concrete.jpg
concreteisolated.jpg
As you see in the last image I posted, I toned the opacity down a bit. But with this next image, I played with the layer mode and the one that suited my fancy was Linear Burn at 36% opacity. It burned the skull enough to give it a weathered feel but not over done.
colored-complete-2.jpg
I made a new layer, added some white for highlights in certain portions of the skull, and changed the layer mode to soft light @ 100%.
colored-complete-3.jpg
Now it was time to add the tattoo flourishes. I pasted them in, sized them according to the AI file’s placement, cut the excess off the same way I did with the concrete, and changed the layer mode to Multiply @ 70%.
decalled.jpg
decalled2.jpg
So now, I added some eyes to it from our Anatomy pack, colored them in, added a tint of red around the edges to make it look realistic and we have this result: The Finished Skull!
decalled3.jpg
So now to the background. I chose one of the watercolor textures from The Arsenal, a paper texture from Stock Exchange, we doctored up the solid background layer with some funky greens and we got to playing with the layer modes. The watercolor texture’s coloring was changed to a more blue-friendly scheme with the hue/saturation tool. I layered it in Multiply mode @ 100%. I slapped the paper texture over that because it wasn’t quite doing the trick alone and layered it also in Multiply mode @ 100%.
background.jpg
background1.jpg
background1half.jpg
background2.jpg
Combined result with the aforementioned layer modes (sans paper)
background3.jpg
And with a few more doodads in the background and skull, the paper added to the background, and the airbrushed layer brightened…
backgroundalmost4.jpg
we have…….
sugarskull_finalimage_web.jpg

read more

Logo Design Project Step by Step Walkthrough

Read the article
Free 
Website Builder
A personal project I'm currently working on with a developer friend is a website called myNiteLife. As part of the overall design process one of the first jobs of the project was to develop a logo and brand for the website, follow this step by step documentation of the whole process of the logo design from conception to completion.


Background information:
The whole idea behind myNiteLife is to provide an online organizer and planner for our local city of Sheffield's nightlife, where bars, restaurants and clubs amongst other venues are listed along with user reviews and ratings. Also, the site includes a planner based on a map of the city, where users can plan a route between venues and send out party arrangements to their friends.
With this information in mind, the brand should relate to the audience of 18-40 and express the fun, sexy and nocturnal aspects of city nightlife.

As always, the first stage of the process was to scribble down some ideas and drafts. The original ideas sketched out included the use of spotlights, rounded typefaces, dancing silhouettes, moon shapes and classy serif typfaces.

I then booted up Adobe Illustrator to test out a range of type treatments, ranging from thin and modern sans-serif to sexy and classy serifs.

The next stage was to develop various choices of type into draft logo concepts, basing some ideas on the initial thoughts doodled out in the sketches. Planning ahead to the website I knew that a fairly dark colour scheme would be used, therefore I developed the logos on a black background to make sure they looked their best.

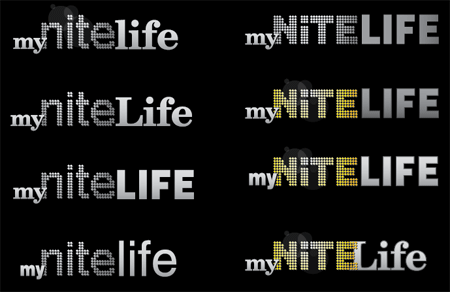
Continuous ideas and concepts developed the logo into four possible concepts, these were then sent to a few friends for their thoughts.

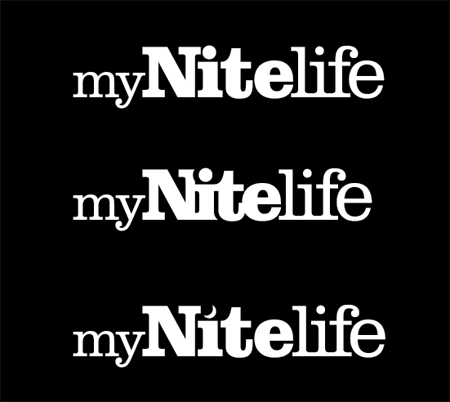
The chosen version was the entirely slab-serif based logo, this was then concentrated on and tweaked slightly into two new versions. The first tweak was to test out the logo with tighter kerning making the letters butt into each other and the second was to swap the dot on the letter 'I' for a crescent moon to represent the night time element.

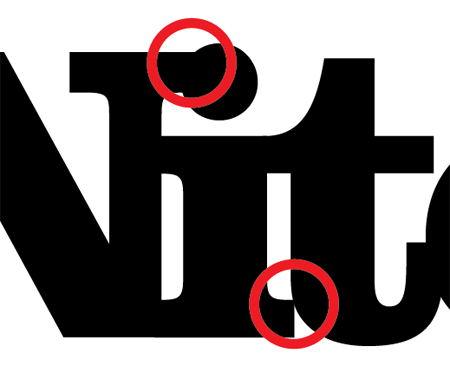
The tight kerning gave the logo a more modern and attractive appearance but made the letter 'I' interfere with the capital 'N'. Combining this with the use of the crescent moon was a perfect solution.
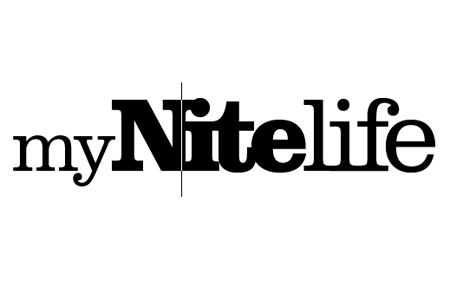
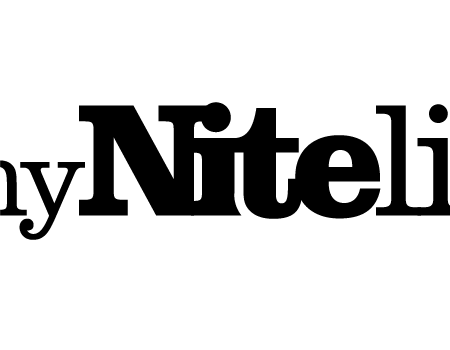
One other issue was the slight interference with the letter 'I' and the letter 't', experiments were made to knock out part of the letter with a flowing curve following the line of the 't'. This helps solve the problem and adds a little designerish touch!
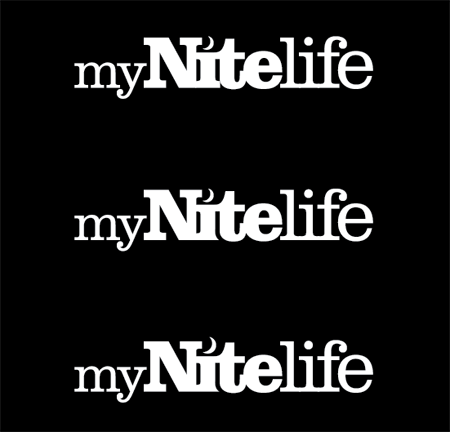
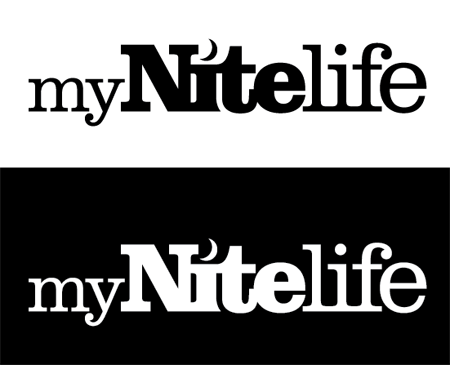
The complete logo design was then complete, shown in it's barebones mono state before being treated to colour and subtle effects.

The Making of the myNiteLife Logo
Now you've seen my personal development thoughts behind the logo, I thought it would be great to show the techniques used in Adobe Illustrator to create the final logo from scratch.

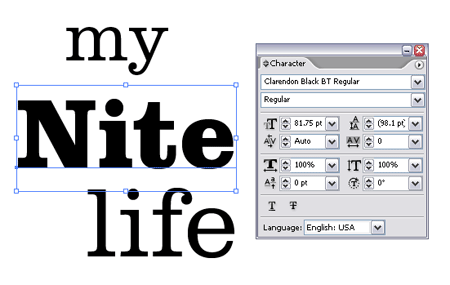
First off, the wording 'my', 'nite' and 'life' were typed out and set in the chosen font of Clarendon, making use of both light and black variations.

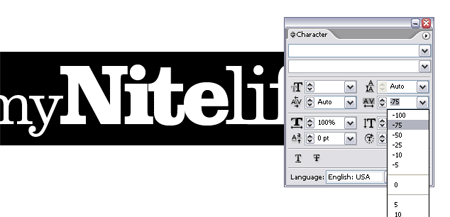
The tight kerning was quickly applied by choosing the -75 option from within the character palette.

Additional kerning adjustments were made to individual letters, ensuring that all characters overlapped slightly. This was done by using the ALT key along with the left and right cursor keys.

As mentioned previously, this causes unwanted interference with some characters, the solutions of which were to add the pretty curve along the letter 'I' and swap the dot for a crescent moon.

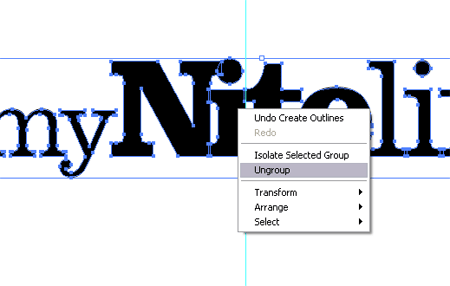
The line of type was converted to outlines (Type > Create Outlines) to make each letter an editable shape. These were then ungrouped to enable access to the letters individually.

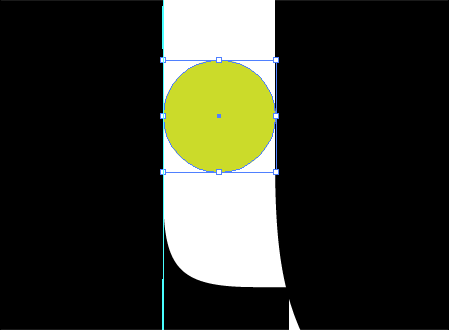
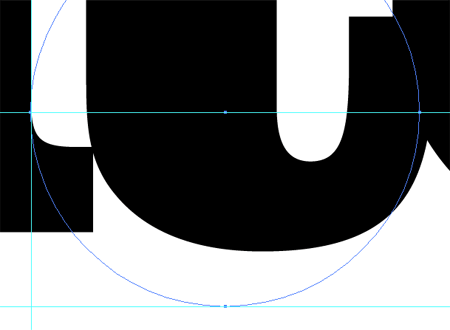
A temporary circle was used as a tool to measure the gap between the letters 'I' and 't'.

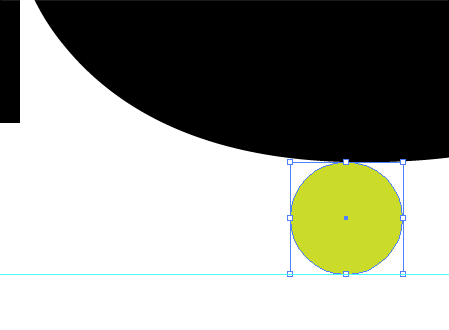
The same tool was used to plot a guide at the same distance from the bottom of the letter 't'.

A third guide was added to the lowest most part of the straight edge of the letter 'I'. Using all three guides a larger circle was drawn which resulted in an accurate curve that followed parallel to the outline of the letter 't'.

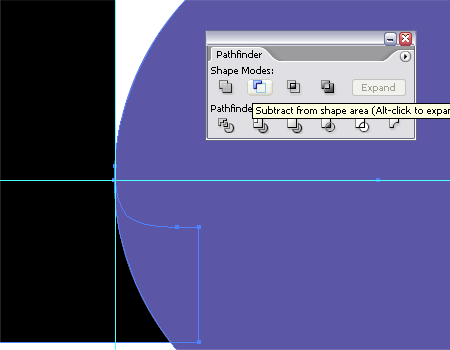
Using this new circle along with the Subtract from Shape Area option from the Pathfinder tool enabled the excess section of the letter 'I' to be chopped out.

The resulting shape of the letter 'I' I think gives a slightly more unique characteristic to the logo.

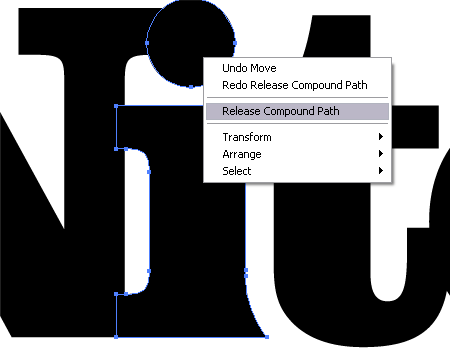
The final fix to the logo was to add the crescent moon shape to relate to the night aspect of the brand. To edit the letter 'I' the Compound Path was released to separate the shape into two pieces.

The dot was scaled up to give more of a visual impression, then a temporary circle was used to knock out an area of the shape to give the crescent shape.

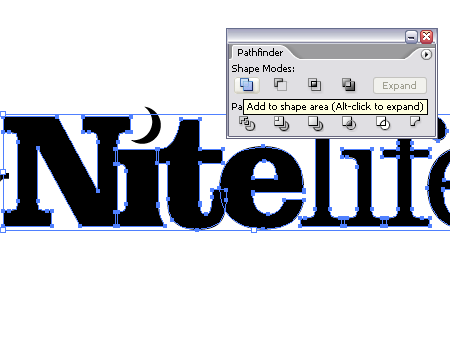
The only remaining step was to clean up the logo by combining all the individual letter shapes into one complete object using the Add to Shape Area from the Pathfinder tool.

With the logo being generated in the mono state it could then be given some sprucing up with colour and slight visual effects. The colour purple was chosen for the brand to relate to the sexy and classy image that the myNiteLife site was to portray, and also gives a nice deep colour to represent the colours associated with dusk.
Love it or hate it? I’d be happy to hear your thoughts in the comments.

read more